

Assignment 2 - Animation For the Creative Industries
- AlmsAni

- Apr 30, 2023
- 7 min read
Updated: May 26, 2023
For this assignment, we were tasked with creating a short animation that demonstrates a development in our animating capabilities. I knew what I wanted to animate going into this project, as over the course of the last few years I’ve discovered my personal niche for animation being 2D character animation with 3D backgrounds and assets. This niche was discovered through my love for the work of Joel Guerra, a Peruvian animator best known for creating the ENA series, and its upcoming game. His work heavily draws from the aesthetics of 2000s era computers - particularly their UI and layout - along with being inspired by LSD Dream Simulator. Sound design draws inspiration from Runescape, and character designs are influenced by the old works of Picasso.
In the past I’ve already created an animation in the ’ENA style’:
And as I really enjoyed the process of creating that short, I wanted to create another.
My goal going into this assignment was finding a blend of surreal and macabre. When brainstorming ideas, I came up with the setting of a graveyard near a large lake. This was inspired by both the huge lake between Loughbrickland and Newry, as well as the Motte and Bailey in Dromore, near where I live. The idea for the name of the short came when thinking of a surrealist spin on the concept of a graveyard; I ended up with the name Motte Hotel, as the idea of bodies staying in the dirt like a hotel felt fitting for what I was aiming for.
I already had the ref of the main character, Sai, as well as reference images for Ena herself, as I planned to include her in the short in hopes of creating a short that looked like it could believably fit into the ENA series. I also created the following concept art:


To mimic the ENA style, the talking animations would loop for the duration of the character’s dialogue, with one character showing on screen at any time. The movements that Joel animates have a bouncy feel, mainly being animated on 2s. There’s no use of smear frames, with the characters keeping on model with an almost rotoscoped appearance. The movements are exaggerated and jittery, surreal, even. Ena in particular can move her limbs wherever due to them being detached from her – same with her head. Her torso can seemingly twist 360, also. I made sure to keep this all in mind as I created the loops of her. I also wanted to include an animation that clearly shows a transition from her sad to happy side – present with not just the voice-acting, but also clearly through body language. With Sai, I wanted to keep her body language more subdued – showing her sombre demeanour.
For this project I also wanted to try my hand at creating a simple soundtrack in the style of Oliver Buckland specifically. His music often appears in the ENA series, with him even becoming an official composer for it going forward. In the past I’ve attempted to create music to no success, as something about the timing and layout of everything fuddles with my brain. But as the tracks used for ENA tend to be so simple yet effective, I thought it wouldn’t be the hardest task. I ended up being wrong on that front, as trying to align the instrument tracks to all follow the same rhythm was infuriating, especially when also trying to figure out Garageband’s (iOS) UI and trying to recreate the melody in my head.
Next, I wanted to record the dialogue. As Sai is my own character who I’ve voiced before, recording her lines was simple enough. The only difficulty arose with trying to maintain consistently good pronunciation with the Spanish. As for Ena, I had to practice both her voices beforehand. Since my voice has deepened, I find Ena’s happy voice easier to replicate, and her sad voice to be harder. But with practice, I think I was able to replicate both voices well. After following a tutorial and experimenting with Audacity plug-ins, I was able to achieve the bit-crush effect that is used in the series. I’m super pleased with the final lines, even if it is a bit cringey to listen to myself over and over haha.
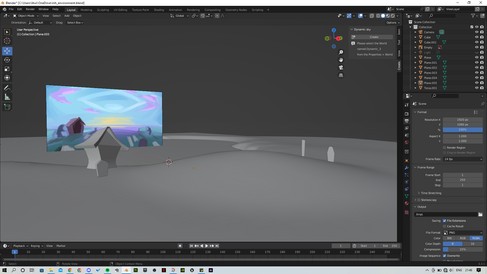
The next task was to create the environment and assets for the 3D shots. For this, I paid attention to the modellers that had worked on the 3D elements for ENA. ….
For my environment, I began working on creating models for the tomb, coffin, and various gravestones. I aimed to keep these assets low-poly and angular - also taking inspiration from the original MediEvil concept art because I struggle to not be inspired by it haha. Studying the ENA videos shown that some locations differ in texture detail; some areas feature solid colours as textures, whilst others have slight detail at a low resolution. I opted for the latter method for my own textures. Following the unwrapping of the models’ UVs, I took to CSP to create gradients with speckled details before applying a pixelate filter to create the desired result.


For the terrain itself, I modelled a low poly environment out of a simple plane mesh. I used both the solidify and remesh modifiers to create the result I wanted. I began painting the textures within Blender, but eventually used CSP to create the texture I had in mind. There was no need for any height, normal, etc maps – just the base colours. Eventually I ended up using the boolean modifier to cut out grave holes in the terrain. Beneath them I created a plane of a solid colour that would later be chroma keyed out in the compositing stages.


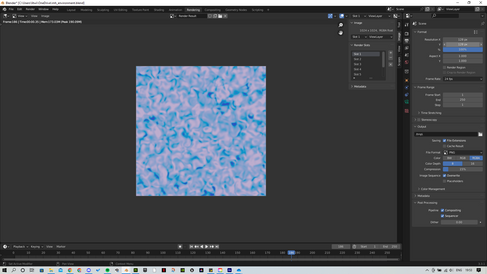
For the water, I followed the below tutorial:
I was super pleased with the result, as it was something unlike anything I’d done prior, and seemed difficult initially. But I ended up finding the process challenging in a non-frustrating way. I plan to see where in the future I can implement effects like this again.


Following this, I created a simple sky sphere using a low-res texture I made in CSP. I tinkered and went back and forth a few times to achieve the result closest to what I wanted, and played around with the sky node’s settings too. To create the clouds, I took a cloud asset I’d used for a now scrapped project, as I’d already rigged it. In the end, I didn’t end up using said rig, but still. I duplicated the cloud to the desired amount, and played around with the scale of each. I positioned them in a ring, before parenting them to a circle mesh – so I’d be able to move all the clouds at once. A simple sphere was used for the sun, and for the eye-shaped cloud, I took a plane mesh and followed a similar process to that of the terrain. The remesh modifier in particular really helped to achieve the asymmetrical look I was aiming for. Naturally, another sphere mesh was used to create the pupil.


I placed assets as I went along, making sure I was matching the initial concept art as close as possible, and constantly checking how the composition looked through a placeholder camera. Nearing the end, I happened upon a tutorial for fog in Blender. to which I figured would look especially neat, and perhaps blend the background with the sky-sphere more cohesively:
Once everything in the environment was to my liking, I set up the camera and began to animate it. Analysing the ENA series shows a pretty stiff camera. Extinction Party in particular was made to emulate a first-person game, LSD Dream Simulator in particular. Thus, the camera movements are rigid and slow – very different from a camera that aims to replicate one’s natural head movement from this perspective. I kept this in mind as I animated the camera: making sure movement was slow and turns were smooth – both to keep true to the ENA series and also to convey Ena’s observation of her surroundings. I made sure to hold the camera on the coffin for the length of time needed, and at the end, I decided to show the pupil of the cloud moving for a split second to look at the camera. Once I’d completed this, I exported the entire sequence.

Inking the 2D shots was a straightforward process, and one I found to be therapeutic. I inked them in order, and edited frames where needed. The only difficulty I found was with the 3rd shot of Sai, as the arm movement was a little tough to keep consistent. I finished them off by filling in the colours, then rendered them as sequences that could easily be looped. They were also rendered as PNG sequences so to keep a transparent background for ease of editing.
Once every shot had been exported as their respective sequences, I imported them into After Effects along with the rendered sequence of the 3D environment. I also imported the music and dialogue, and began roughly aligning everything. It was at this point I realised just how long the entire sequence was. I knew it would end up longer than the submission’s length, but I had been hoping the full animation would be under 30 seconds, but the entire sequence as of compositing was around had a runtime of 1:40. I decided that I’d trim and cut what I could to to have a reasonable submission length. I ended up having to cut the intro sequence and bits of dialogue – I essentially kept the necessary pieces that conveyed what I wanted. I took the remaining parts and tidied the audio up, as well as applying various effects and overlays to mirror the ENA look as best I could.
I’m overjoyed with the final outcome of the project. I’m embarrassed that I couldn’t keep it shorter, but I cant help but love what I produced. It feels incredibly gratifying to have carved out my personal style for animation, (not ENA necessarily, but rather the blend of 2D and 3D elements) especially as someone who had no aims of ever including 3D work in my own projects when not required. I’m really pleased to have learnt the PS1 water technique in particular - the process was fascinating to me. The music was challenging and frustrating to create, but the final track grew on me by the end of this assignment. Using the 3D skills I’ve developed over this year was also very satisfying - I can definitely see an improvement from the last ENA-inspired short. I’m incredibly proud of how it could fit into the ENA series - though in the future, as I plan to create more, I would remember to include sound design outside of the music. Overall, I‘m very pleased with this submission.

Comments