Pukani - Cute Character Assignment
- AlmsAni

- May 16, 2021
- 6 min read
Updated: May 17, 2021
For our last assignment of this module, and our first year into this course: we were instructed to model a cute character, with less than 40,000 polygons. Once I saw the criteria, I began thinking of any characters I had already created that would fit the assignment. I quickly thought of my "mascot/persona", Pukani. I designed her in August 2020, as I had began watching the Sanrio anime Onegai My Melody. I've alwasy been a big Sanrio lover, and honestly. Pukani is mad cute. So naturally she fit the bill:
Research/References:
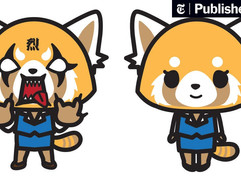
For research, I focused on the aforementioned anime, official sanrio art, and the (now taken down) mobile game from Sanrio: Tomotoru. The latter inspiration really got me excited, as the style of the game took such well established 2D characters, and translated them perfectly in 3D more so than any previous iterations. What I wanted to keep in mind from these references, was the abundant use of round shapes, big eyes, and the pairing of a big head with a tiny body. In particular, I drew most of my inspiration from the character, Kuromi. Not only is she definitely, objectively the cutest, but she is also what mainly inspired Pukani to begin with.
As development of this idea, I completed a page of quick, loose pen doodles of Pukani, (coloured in solvent markers) as further practice with her design. In the middle, you can see I took her design and broke down her main shapes - so I'd have a good idea of what base meshes I would need when modelling. On the right is the sketch I doodled digitally that would serve as her reference image when modelling in Blender.
Modelling
To kick off the modelling process, I started with a UV sphere. I selected the top vertice, and used the proportional editing tool to squish the sphere. I fiddled about with this, along with scaloing to achieve the correct head shape. I next took another UV sphere, (be prepared for a lot of those) and used proprtional editing on it - this time with the "root" shape - so to match Pukani's rounded, triangular ears. Next was the arms. I created a cylinder mesh, then used the muliti-cut tool to create new vertices. I selected the appropriate ones so I could scale different sections to match a stubby arm shape. I duplicated it, shrunk the duplicate, duplicated that one, then positioned the duplicates to look match the pose of the left arm on the reference image. The original arm shape, I positioned to match the right arm, also. For the hands, I simply created a UV sphere, scaled it to the correct size, squished it, again using scale, then duplicated before positioning the hands where they needed to be. The legs and feet were pretty much the same process. The only real difference was that for the feet I used proportional editing on certain vertices to shape the straighter heel ends, and curve the rest. The body was simple: just take another UV sphere, and again use proportional editing on the top vertice. The face opening of the hoodie, the sweater hem, and its cuffs, were all created from torus' with - you guessed it - proportional editing used on certain vertices. Last, but not least was the little pieces that portrude from the hoodie above Pukani's eyes. We'll call em "flaps". These flaps were just spheres that were scaled down, and shrunk thinner before being rotated and positioned so they were poking through halfway. Finally, I was able to join all the components, and head into Sculpting Mode. I used the draw, clay strips, clay thumb, layer, inflate, blob, crease, smooth, flatten, fill, pinch,and cloth brushes on the model; creating creases in the hoodie and sweater, blending the components together - especially the flaps, as they created some chaos with the hoodie opening and the head itself.
I imported the ""final"" model into Maya to work on the UV map. Some of the faces on the arms were inverted however, so I created an automatic UV map, and selected by UV shells so to select the inverted faces. I used "set to face" on them, before using "reverse", which thankfully fixed the problem. I was about to texture before I realised that the polygon limit for this assignement was 40,000 polygons max. I happily checked what mine was aaaand. 612,000+. Oops.
This meant that the next course of action was retpology - of which I kept trying alongside tutorials but couldn't get the hang of. I searched for further tutorials online, and wound up finding an auto-retpology add-on for Blender called QuadRemesher. I quickly got it installed, and used the "remesh" tool on Pukani. Thankfully, it took my polygon count down to 20,000+ - however, the resolution was blocky. I tried using a subsurface divide modifier but it just took the polygon count back up to 100,000+ again. I quickly discovered from the uni Discord group, that all I had to do was head into Edge mode, (back in Blender) then select "smooth edge" from the Shading tab. This smoothed everyhing out, thankfully. I figured that since I now had the polygon wiggle-room, I could further push some details. I figured, to make texturing easier, I would use the multi-cut tool and cut out the tips of Pukani's ears. Painful. I selected the faces of the tips, duplicated the shape, hit P, (for separate. obviously) and separated by selection. I then added the solidify modifier - bumping up the thickness a tad afterwards. I took this, duplicated it, and moved it to fit around the other ear. I added more smoothing and creases where appropriate using Sculpt Mode along with some eyes, (created with a plane mesh, multi-cut tool and solidify modifier) and her nose, (simple, scaled down and stretched UV sphere), then finally rendered Pukani's model.
I figured I could also create a little grass base for her to stand on for the Sketchfab upload. All I did was create a UV sphere, and used proportional editing on certain vertices. I then took a cube, and used Boolean, difference on them so to give the base a clean, flat bottom before rendering. Simple!
Following the modelling of each parts, I first decided to texture Pukani. I downloaded some SBSARs I thought I would need, including: a grass one, a dirt one, a wool stitch one, and two fur ones. I firstly went over with the Plastic Matte material for the base colours, then went over the hood and sweater components with the wool stitch SBSAR I had imported. I turned off the basecolour, metallic, and height settings for it, so the colour would remain on the components, but the wool stitch texture would be added on top. I had coloured Pukani's skin white, per the design, and initially tried using either of the fur SBSARs over it. However, both were too harsh and out of place so I decided to not go with them - I figured the model looked nicer without them regardless. I went in lastly to do the detailing on the face, aka the hair curls and eyebrow lines - however it became clear, (or rather, didn't) that the resolution of the brush was too low and pixely. This gave a less than desired appearance, but I was too far into texturing to start over. Despite this, I was really pleased with her textures.
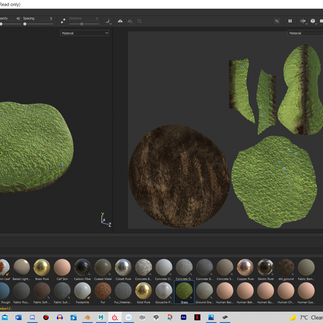
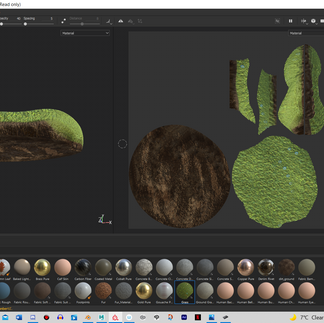
Next was texturing the grass base I was putting Pukani on. I simply used two SBSARs - a dirt one and a grass one. I turned off the height settings, before painting on the grass texture. I did the same for the dirt one, then, to cause a nice gradient: I lowered the opacity and increased the flow to 100 of the grass texture, before using it to blend the grass/dirt a little more together. I'm super pleased with the outcome - simple, but just what I was needing.
Upload
Finally: I took both of the models into Blender, exported them as an FBX model together, then uploaded it and the needed textures onto Sketchfab. I assigned said textures to each model, added some shadows, then bam! Done at last.
Here's the final model! :

Conclusion:
Overall, I’m really thrilled with the quality of my Pukani model. I think she turned out way better than I thought someone with my skill level could have made. I believe I could have done a better job with the sleeves, I regret not retpologing myself, and I’m miffed that the resolution of the textures for the face detailing wasn’t great, but regardless I think Pukani came out lovely. Its really surreal seeing one of your own characters in a 3D model form – but really cool! As for this module, initially it was the hardest hurdle to get over. Switching from Maya to Blender seemingly so fast was hard to adjust what with remote learning, and it was a really tough learning curve to have to work through my little confidence, along with the endless tiny problems that the softwares, and slow computer threw at me. Initially, I wasn’t very optimistic going into this module, and 3D in general – but now, at the end end of it and my first year, I’m pleased with my progress and what I’ve learnt. Most shockingly of all perhaps, I might even dare do some personal projects in the medium.
Research:


Comments